There’s a plethora of reasons why page speed is important for websites. It is a critical aspect of website administration regardless of your niche. It plays a vital role in major factors from ranking high in Google search results to providing your guests with satisfactory user experience. These are the essentials for making conversions – the bread and butter of commercial websites.
There’s more to the web than WordPress, but the mere fact that it powers almost 60% of the web gives Google all the good reasons to dedicate an engineering team to make it work efficiently for both users and search engines. To make this happen, Google introduced PageSpeed, a useful tool to help in the performance optimization of websites.
Before we start, it is important to clarify that the focus of this article is PageSpeed the Google tool and not page speed.
PageSpeed and page speed are two completely different things. PageSpeed is a Google metric, a family of tools designed to help the performance optimizations of websites while page speed refers to the real-world speed of a web page. If you ask whether it is possible to increase one without the other, the answer is a definite Yes. In this article, we are going to discuss PageSpeed and its ability to optimize WordPress sites, but we still have to touch page speed a bit too make sure that certain things are clear to you.
Here are the most effective ways to optimize PageSpeed in WordPress:
1. Switch Over to HTTPS
Switching the site to HTTPS will create the 301 redirect with some change in the settings.
In our experience, before we switched over to https, the time our site spent to load was 10.1 seconds. After the switch, our page loading speed increased with 9.4 seconds.
If the site doesn’t redirect automatically, you should use the plug-in called Force HTTPS to redirect it. You may add the following lines to your .htaccess file to get the results you want:
RewriteEngine On
RewriteCond %{SERVER_PORT} 80
RewriteCond %{HTTP_HOST} ^(www\.)?domain\.com
RewriteRule ^(.*)$ https://www.domain.com/$1 [R,L]
Note: You need to change the code on the third and fourth line from domain.com to your URL.
2. Optimize Images
Anyone familiar with how websites function knows that images are among the most common causes of pages that are experiencing reduced speed.
Google PageSpeed Insights tells all website owners to optimize images. In order to heed this advice, you may install and run the Optimus Image Optimizer plugin or manually edit the images with tools like the compressimage.toolur.com.
There are two possible ways for optimizing images:
Compressing and Resizing – Images that are physically larger than they should be need to be compressed and resized. Situations like this are not uncommon in WordPress. They happen when images that are larger than the space they ought to occupy are added to the media library and placed on a page.
Compressing – Many images come with “excessive baggage” in them including an excessively high quality that might be unnecessary. In order to deal with this, you’ll need image compression to optimize page speed and make sure that the images will still look the way you want.
You can actually optimize a large image from 9.2 MB to 175 KB without causing visual impact on the page.
3. Leverage Browser Caching
Large internet files take time to load, more so if your internet connection or mobile device is slow. Minimize this problem through browser caching. Do this by editing your HTTP headers to set expiry times for certain types of files.
Your website will take some time to load during the first visit. But when that same user revisits your site, your website will load faster if you use browser caching. It is simply because some of the files that visitors need from your site are already stored in their own machines. This means the amount of data that a user’s browser needs to download is reduced and the requests to the server become fewer, resulting in shorter load times.
There are two methods for setting up browser caching:
3.1 Adding code in the .htaccess file – you can set up browser caching by adding some code to your .htaccess file.
## Start browser caching ##
ExpiresActive On
ExpiresByType image/jpg “access 1 month”
ExpiresByType image/jpeg “access 1 month”
ExpiresByType image/gif “access 1 month”
ExpiresByType image/png “access 1 month”
ExpiresByType text/css “access 1 month”
ExpiresByType text/html “access 1 month”
ExpiresByType application/pdf “access 1 month”
ExpiresByType text/x-javascript “access 1 month”
ExpiresByType application/x-shockwave-flash “access 1 month”
ExpiresByType image/x-icon “access 1 year”
ExpiresDefault “access 1 month”
## End browser caching ##
3.2 Browser caching via the plug-in W3 Total Cache route
First you need to install the plug-in and once you are finished, you can proceed to browser caching which is quite easy. All you need to do is go to the general settings, click the enable browser cache box, save all settings and you’re good to go.
In our own observations, the W3 Total Cache has the capability to provide acceptable results in a number of tasks and in most cases.
4. Reduce Server Response Time
There are times when we encounter scenarios where you’re being asked to reduce the time your server takes to respond. If you are caught flat-footed in this situation, you might come to think that your hosting environment needs an upgrade, but before you decide, you need to sit down and find easier alternatives first.
In many situations, upgrading a hosting environment is not necessary to reduce server response time. There are a lot of things that can trigger servers to take time to respond and one of these is the messy back and forths between your PHP files and your database. This should not be a problem because the W3 Total Cache has a solution which is called page caching. This can help to make things faster even if you are not getting any server response warning.
Page caching works by creating a static copy of a page instead of requiring the server to generate the page on every visit. This makes your server free from a significant volume of load.
This is how you’ll turn page caching on:
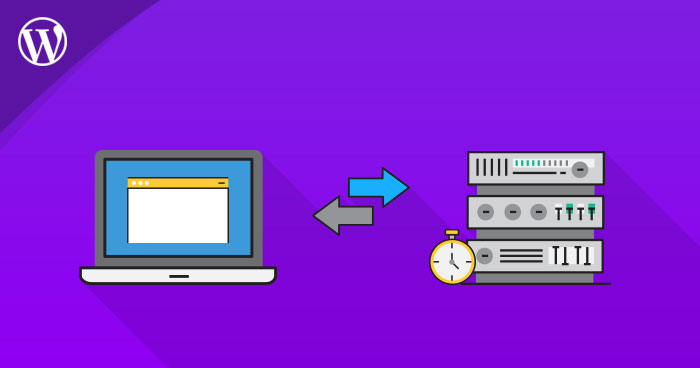
Please take note that customization options are available for this feature. The page cache settings allow you to select pages. Always keep in mind that the cached pages you create don’t change. Updating a page prompts the W3 Total Cache to clear the cache for that particular page and rebuild it.
This however doesn’t affect global utilities such as menus and widgets because you can still update them without the cache clearing. When you make a change, you should be able to see the update live. If nothing happens, just click either the “purge cache or “empty cache” button in the plug area.
5. Minify Files in Your Web Pages
If the files in your web page contain multiple lines and empty spaces, the files are heavy with bytes that can slow your page speed down. You need to remove these bytes in order to improve page speed. This process is called minification.
There are three methods of minification that are applicable to WordPress sites. These include:
HTML – The code of actual pages
CSS – The code within your style sheets
JavaScript – The code within your various scripts
When you minify files in your site, you must make sure to visit the pages that depend on them. See to it that that those pages continue to work properly in order to achieve desirable results.
To make things easier for you, download minified files from Google.
This download option includes images, but as far as our observations are concerned, its results are not as good as the results of the other methods referenced above. You may also download the minified version of the JavaScript and CSS here, but if you update the plugins that created the scripts – a problem can occur which means you’ll have to do it over again.
You may also use tools available at CSSMinifier.com or JavaScript-minifier.com for the same purpose, but here is one thing you must remember: If the plug-in updates are involved with the script or styles, you don’t have to include the references that call the primary files in the code.
An alternative would be to get back to W3 Total Cache once more as it includes in the general settings.
To get good results, you should minify files one at a time and test the site between each minification. If you are not quite happy with the results, go back to the minify settings and try to exclude specific scripts and style sheets.

You may exclude pages that are causing problems with another page such as the contact page or a slider.
This method of minifying works in most situations, but if it doesn’t make things better for your site, you should try Autoptimize to perform the same task instead.

You may want to use KeyCDN to minify files. First, you need to install and run the Optimus Image Optimizer plugin to convert images to .webp. To deliver the .webp images, use KeyCDN’s free WordPress Cache Enabler plugin. They have converted these for visitors using Chrome browsers for faster downloads. In the settings, be sure to check the “Create an additional cached version for WebP image support” option to get the results you want.
It is important to optimize your PageSpeed. It can make a difference not just in your website but in your business in general.
We at Muzeum Marketing can help enhance your website PageSpeed and make sure that you are not losing any website traffic. Please call us at 303-466-3055.

